
What is E-invoice?
An e-Invoice is a digital record of a transaction between a supplier and a buyer, validated in real time. It includes details like seller and buyer information, item descriptions, prices, taxes, and total amounts, with unique identification for verification. Many countries, including Malaysia, have implemented e-Invoicing as part of their regulatory framework to improve transparency and compliance.
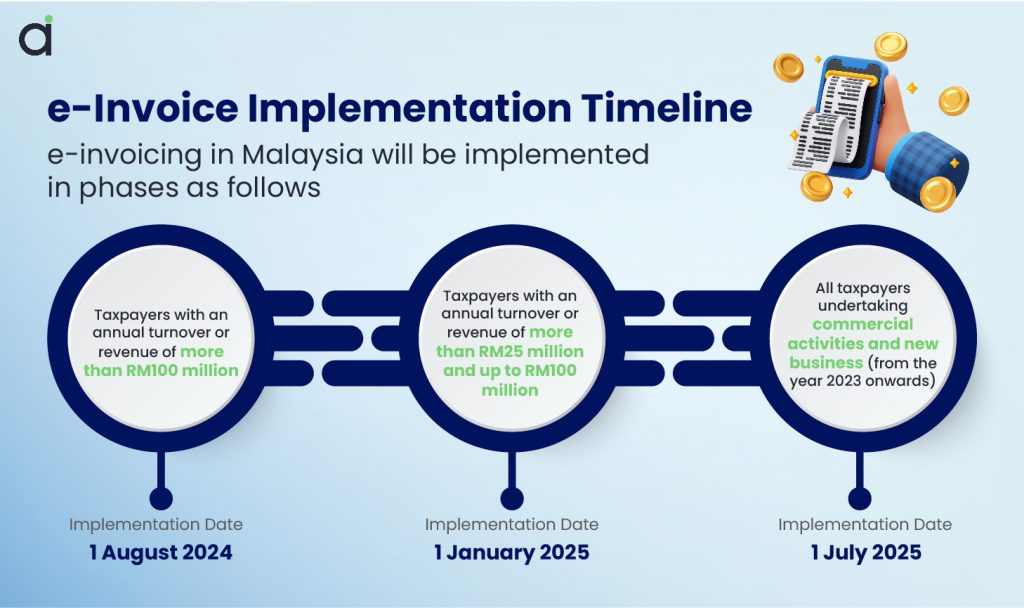
Assist Biz now provides an e-Invoicing feature designed to seamlessly integrate with Malaysia’s GoFT regulations, making it easy for businesses to manage invoices while staying fully compliant.
This guide provides a simple and clear overview of how to use the E-Invoice feature on the Assist platform, ensuring a smooth experience for managing and sending invoices effortlessly.
1. Registration to Use E-Invoice
Follow these steps to register and set up your account for E-invoicing:
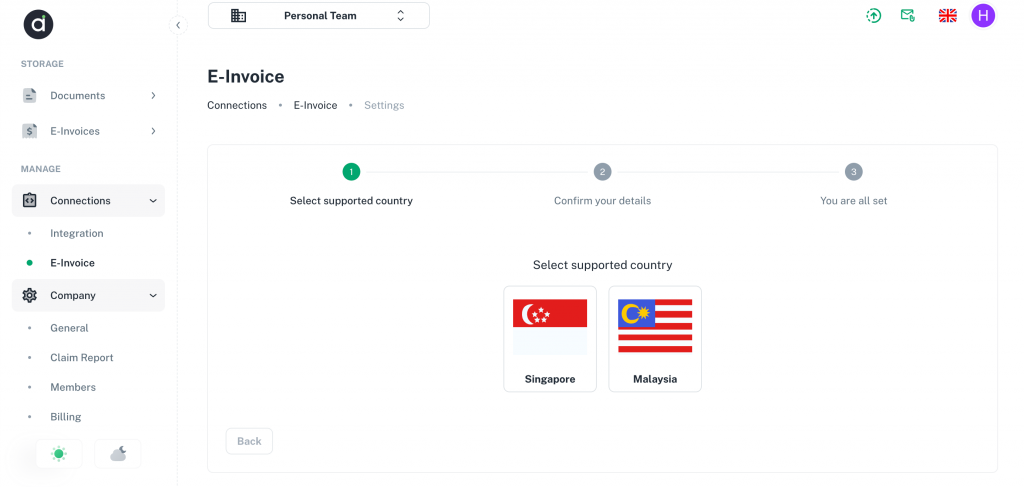
1. Navigate to Connections > E-invoice in the ASSIST application.
2. Select your country from Screen. (Note: Currently, we support Singapore and Malaysia only)
3. Enter the necessary details for registration.
Setup connection required information
- Singapore
Company Name
Address
Zip code
UEN
Name and email of the contact person (For Corppass validation)
Malaysia
Company Name
Address
Zip code
State/County
Contact phone
TIN
SST
4. Submit your registration form.
5. Our team will verify your information. The setup process may take 1-2 business days.
- For Singapore Users: Once the setup is completed, you will receive an email from InvoiceNow to verify your CorpPass. Please complete this step to unlock the E-invoice feature.
- For Malaysia users: Click here to learn more
2. How to Send an E-Invoice
For Accounts Receivables (AR)
To send an invoice as an E-invoice for Account Receivable (AR):
1. Upload Your Invoice
- Upload invoices to Assist either:
- Directly under Documents, or
- By sending the invoice via email to your configured Assist email address.
2.Verify Document Classification
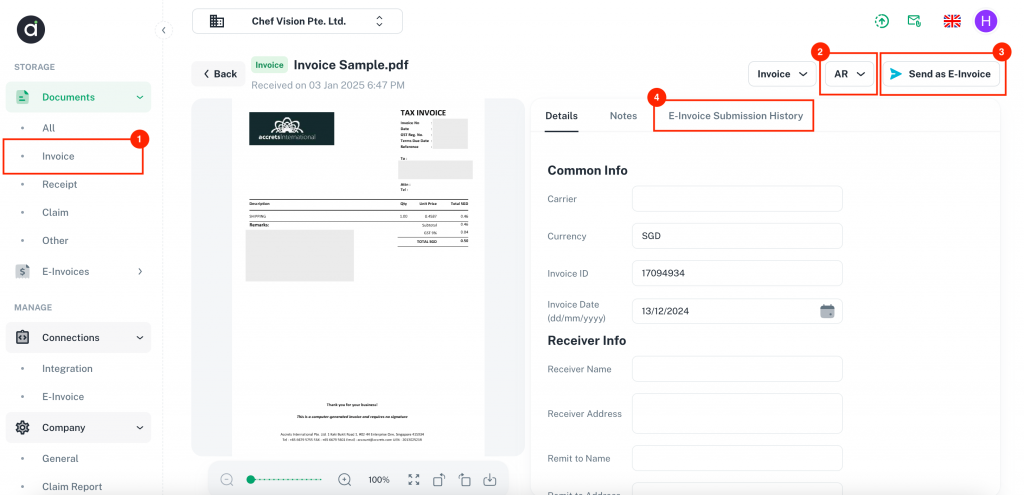
- Ensure the document is classified as AR (Accounts Receivable).
3. Send as E-Invoice
- Click on Send as E-Invoice. A pop-up window will appear, prompting you to fill in the required details.
Required information to send as E-invoice
All invoices must have, SG and MY have the required info as below:
Singapore
Receiver UEN
Line item
Tax category (with tax rate)
Malaysia
Issue Time must be within 72hours
Receiver TIN
Receiver contact phone
Line item:
Product classification code
Tax category
Quantity unit code
4. Review E-Invoice History:
Track and review the E-invoice’s submission and status under the E-Invoice Submission History tab.
Status Information for Document Submission
Status | Description |
|---|---|
Failed | The document could not be sent |
Succeeded | The document was successfully received by the recipient |
Cleared | The document has been successfully validated and approved by the government (IRBM) but cannot be delivered automatically to recipient.
|
For Accounts Payables (AP)
For AP invoices (bills you receive):
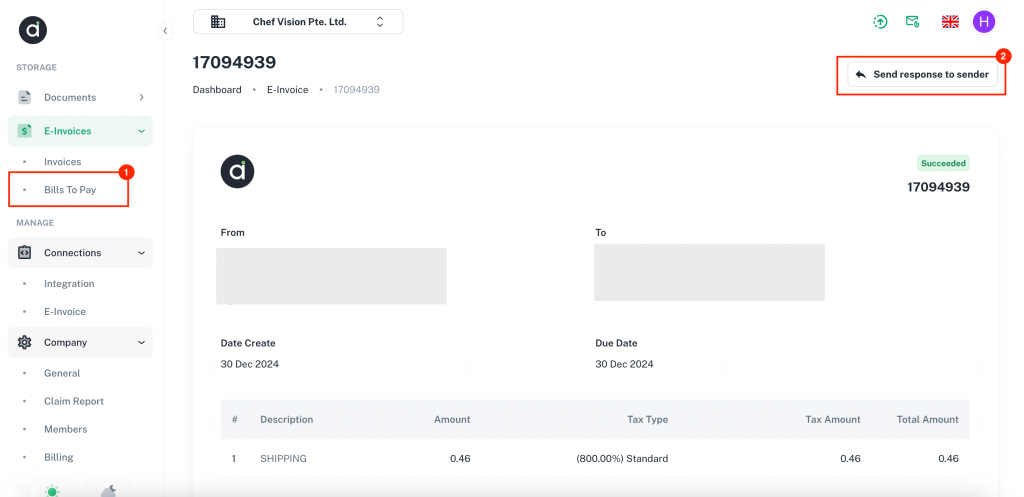
1. Receive Bills via E-Invoice Network
When bills are received through your E-invoice network, they will be automatically uploaded to the E-Invoices > Bills to Pay folder.
Navigate to the Bills to Pay folder to view, track, or process received bills.
2. Send Response to Sender
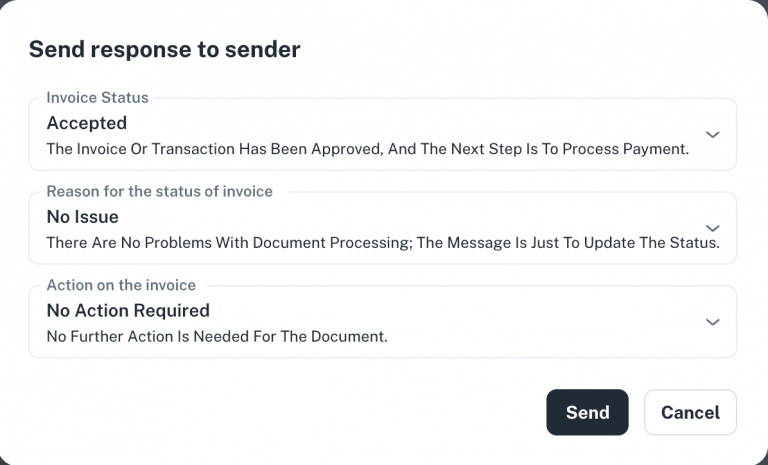
a. To send the response to the sender, click the button in the top-right corner. The fields include invoice status, the reason for the status, and the action on the invoice.
Watch more about how to start and use E-invoice Feature on Assist!